Jira is a popular tool for team collaboration. Blog posts, emails, social media campaigns, app store descriptions, release notes — all these types of content can be efficiently authored, and now seamlessly localized, with our Jira integration.
Setting up the integration
Log into Smartcat, click 'Create project', and select the 'Set up an integration' option.
Select the Jira tile and click 'Connect'.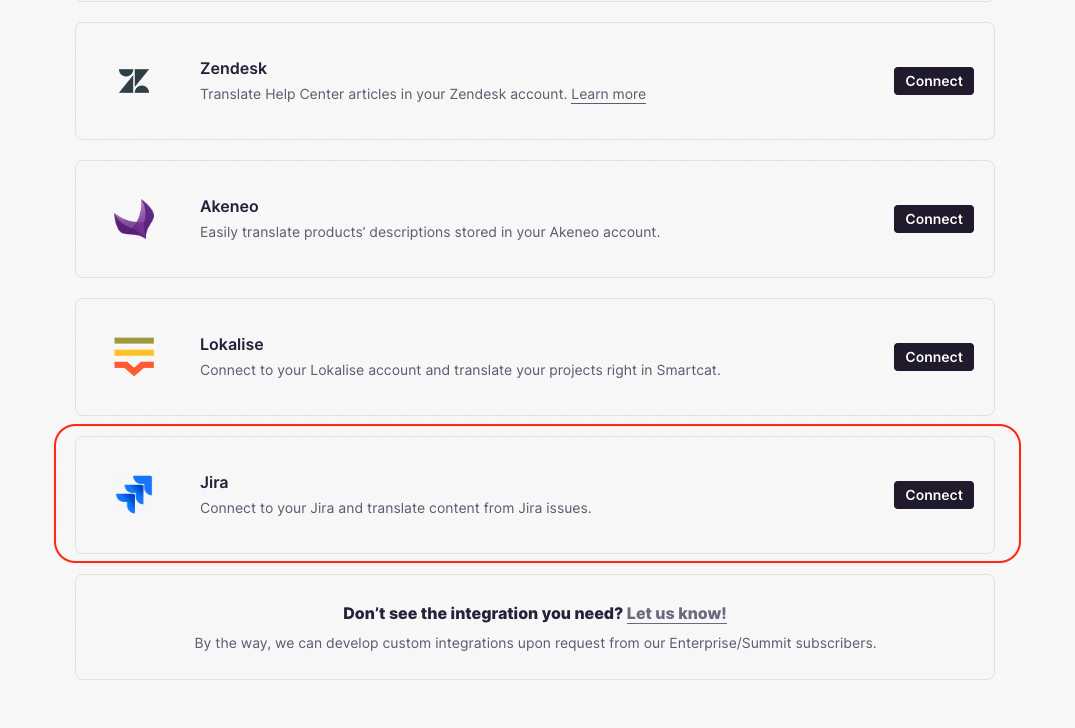
Go to your Jira account, copy your Jira instance URL and save it somewhere (you’ll need it in step 6).
In Jira, navigate to 'Settings' → 'User Management', copy your user email address and save it.
Go to 'Settings' → 'Atlassian account settings' → 'Security' and click 'Create and manage API tokens' under the API token section. Create a new API token and save it.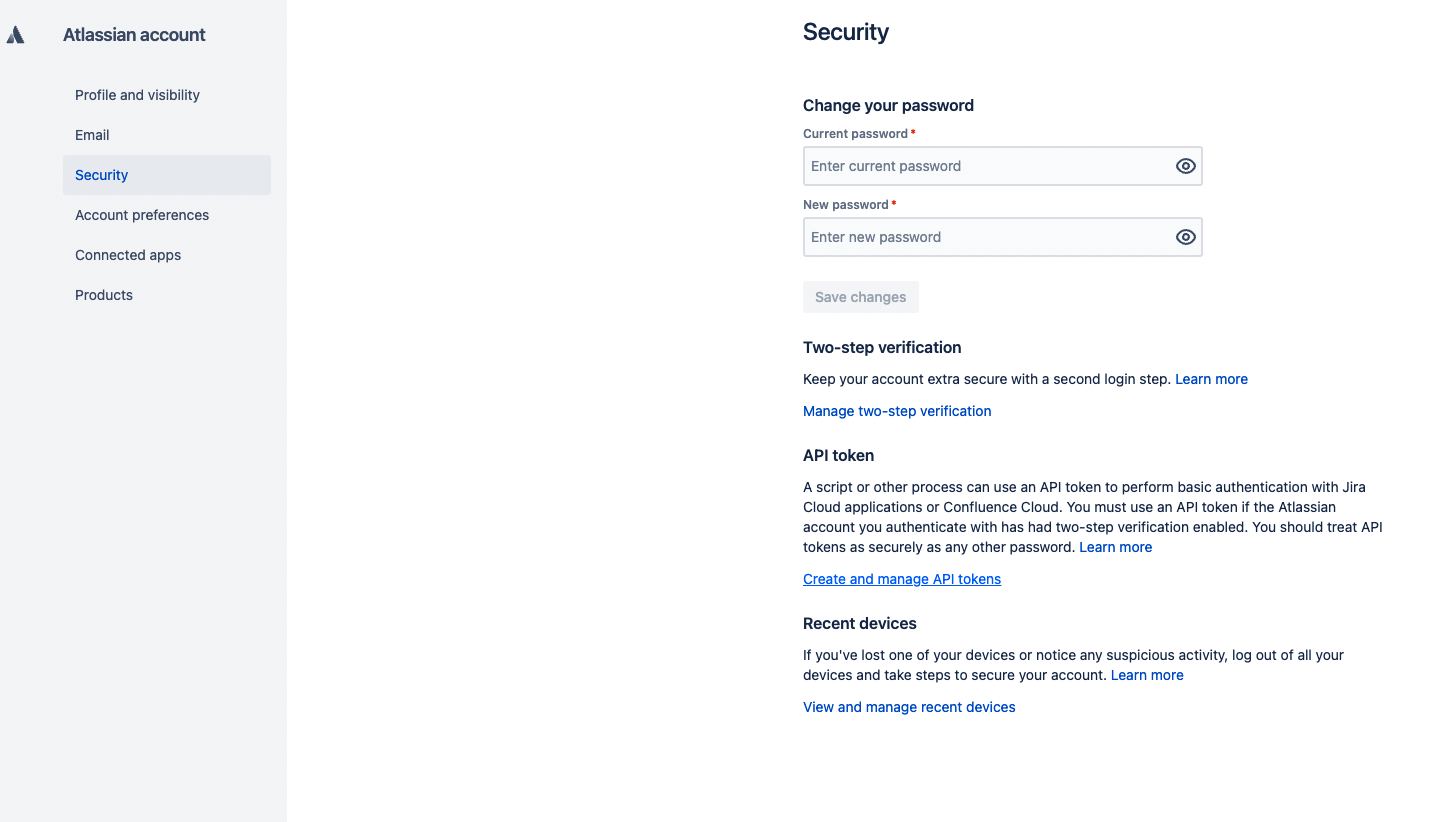
Go back to Smartcat and paste the collected parameters into the corresponding fields, then click 'Set workflow'.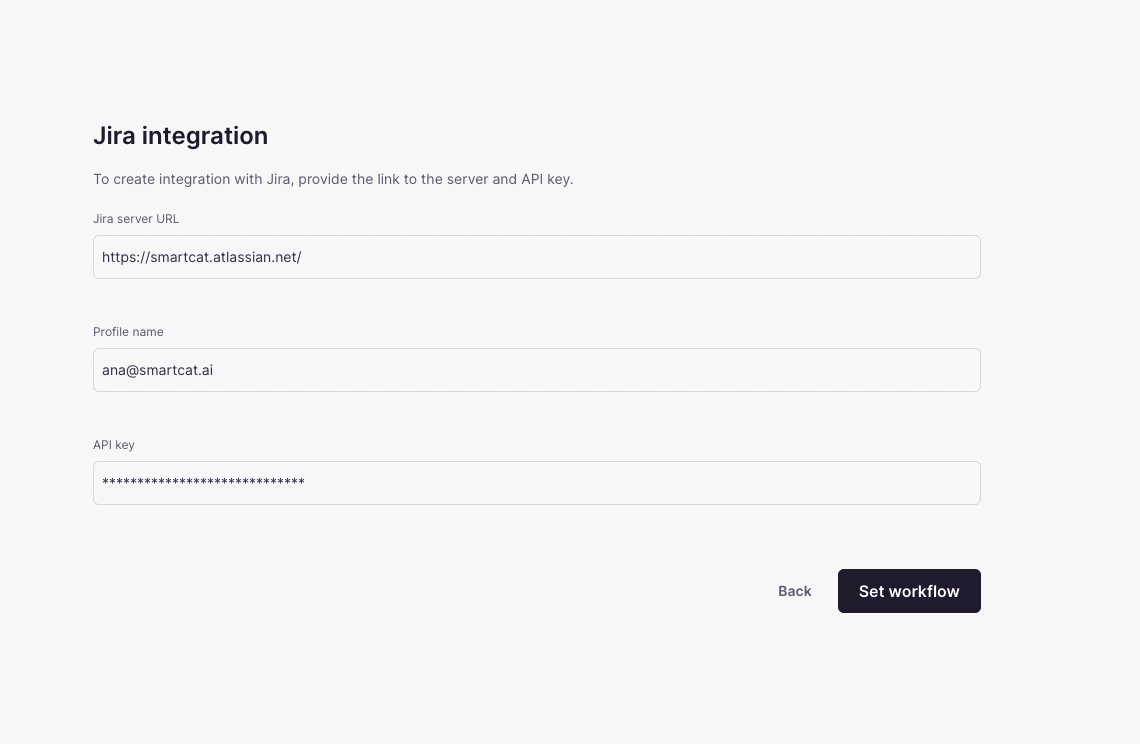
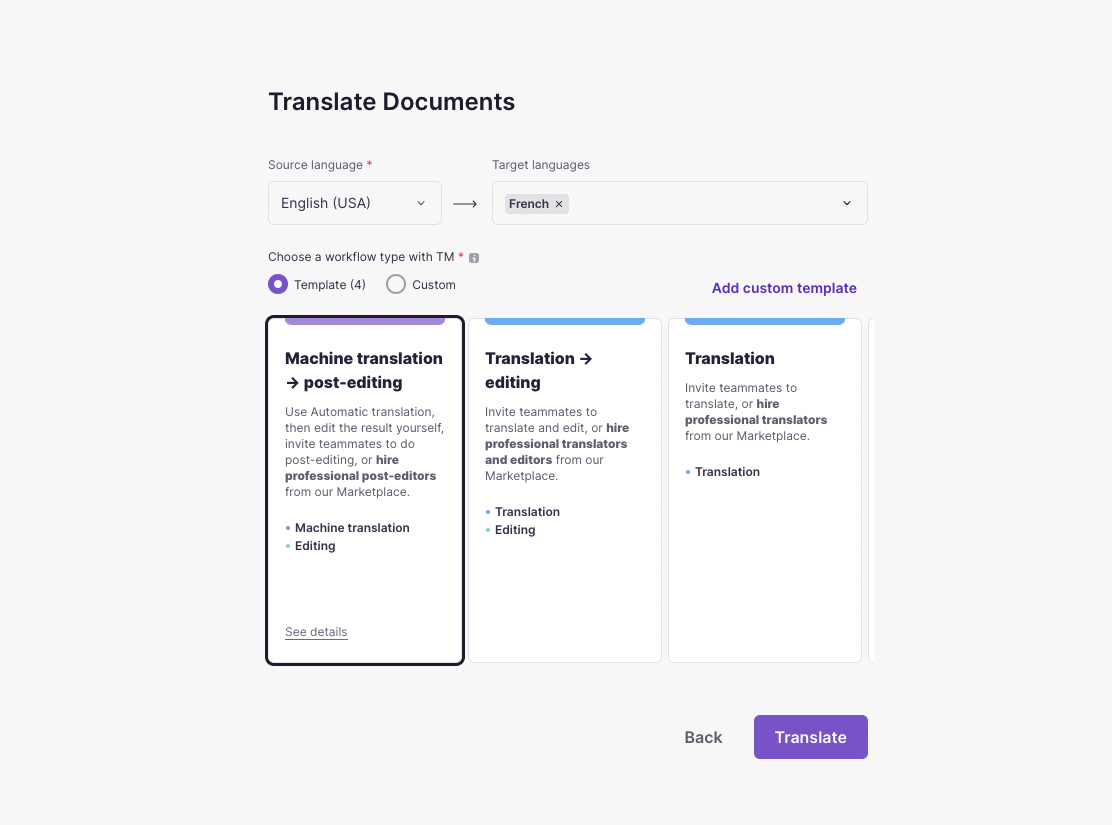
Next, choose the source and target languages, and a workflow – the steps to translate your content.
Please note that the source language you choose should correspond with the source language in the files within the tickets for translation. Otherwise, we won’t be able to translate them.
Choose the project(s) and the main rule* to set Jira issues as translation tasks.
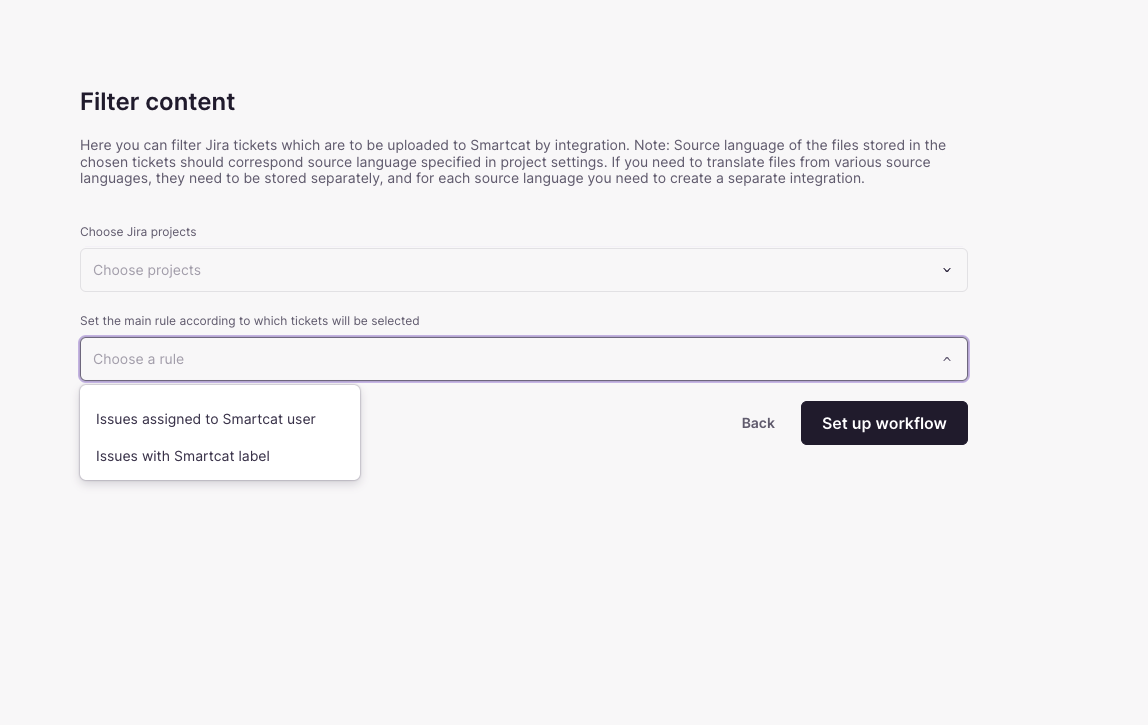
*There are 2 rules you can set:
- Issues assigned to Smartcat user
- Issues with Smartcat label
Did this article help you find the answer you were looking for? If not or if you have further questions, please contact our support team.
