No two projects are the same, but here are the major steps most of them have in common:
Step 1. Create a project
Click + next to the Projects menu item and follow the wizard to create a project with the document(s) to translate.
You can read more about project settings here. As a minimum, set a project deadline so that translators can schedule their time.
Power hack: If your project has several stages — e.g., translation, editing, proofreading, — you can set an individual deadline for each stage in the next step.
Step 2. Choose assignees
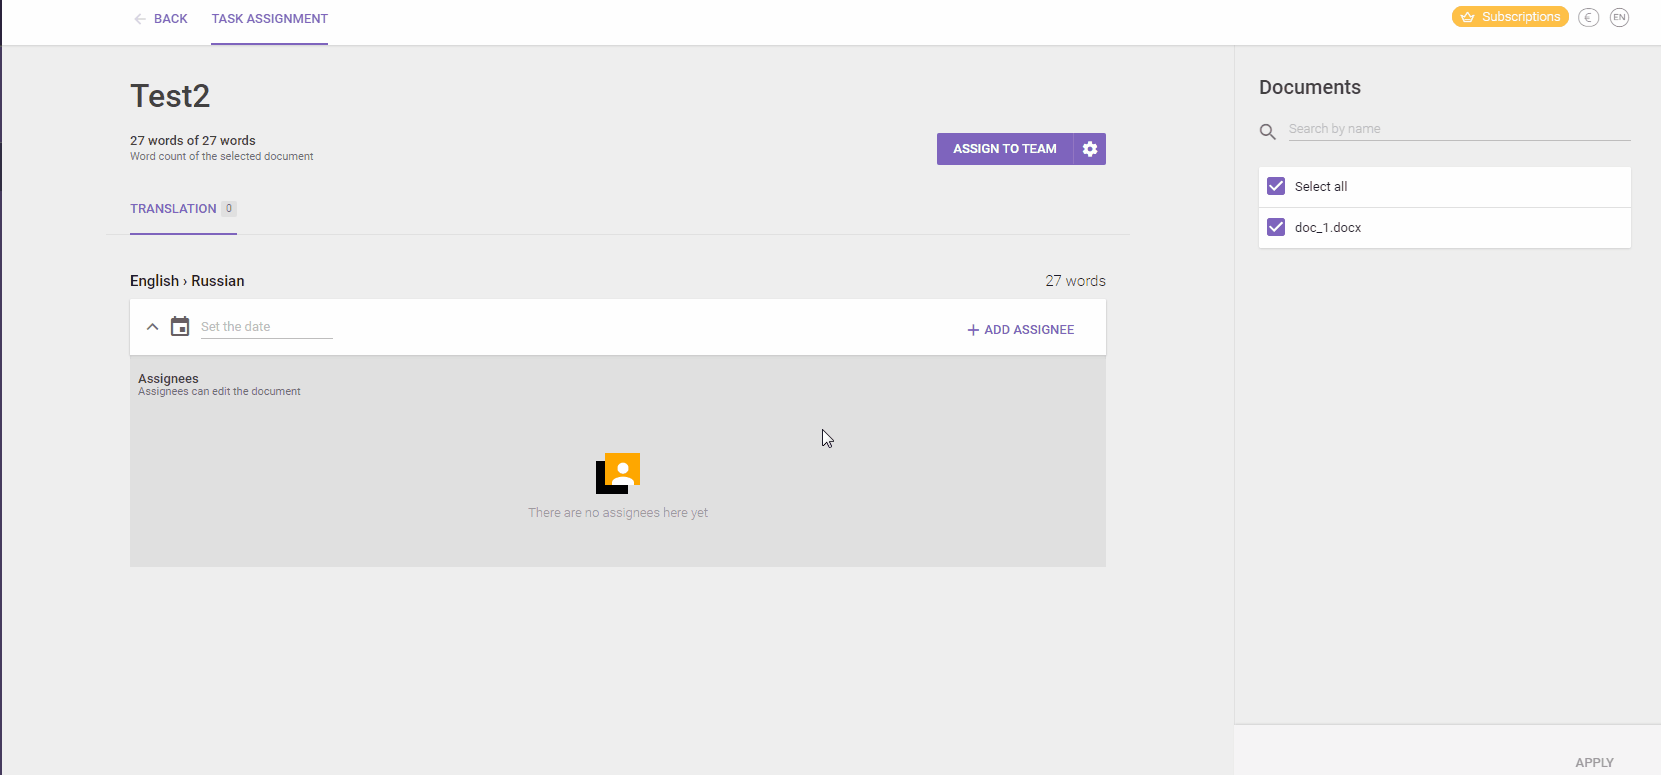
Choose the documents you want to assign translators to by clicking on the respective checkboxes and then click Assign tasks.
Click Add assignee. In the dropdown list, you will see all your team members matching the project’s language pair. You can pick one or several of them. For more flexibility, click on the filter pictogram in the top-right corner of the dropdown list. Now you can set up flexible filters to find the right translator:
If you don’t have enough specialists in your team, you can switch from the My team to the Find freelancers tab and find new translators right here in Smartcat.
You can pick as many assignees as you need. After that, you’ll need to select the mode in which you want to invite them: manual or automatic, aka “Bike” or “Rocket”, respectively.
Manual and automatic assignment
According to the manual (“Bike”) mode, assignees who have confirmed the invitation are placed on the “waiting list” (in the left part of the assignment screen). If you are ready to choose one or several of them, you drag them to the right-hand part. In this mode, you can:
- Pick the best assignee for your project
- Pick several assignees to handle a large document.
In the automatic (“Rocket”) mode, the first linguist who accepts the invitation will get the project. This is useful if:
- The project is rather small
- You don’t have time to wait for all responses
- Invitees live in different time zones, where it may be currently nighttime, and you won’t be online when they wake up and start responding
- You don’t have any requirements or preferences for an invited linguist.
Step 3. Assign and optionally split the document
If the document is small or the deadline is generous, it is always better to have a single linguist do the translation. In this case, if you chose the “Bike” mode in the previous step, you just need to drag and drop the chosen assignee to the right-hand field and click Save without splitting the document.
In the real world, however, sometimes you need to have several people work on the same document. There are two ways to do this in Smartcat — with or without splitting the document.
In the former case, you click the Split document and choose the segment ranges to assign to each translator.
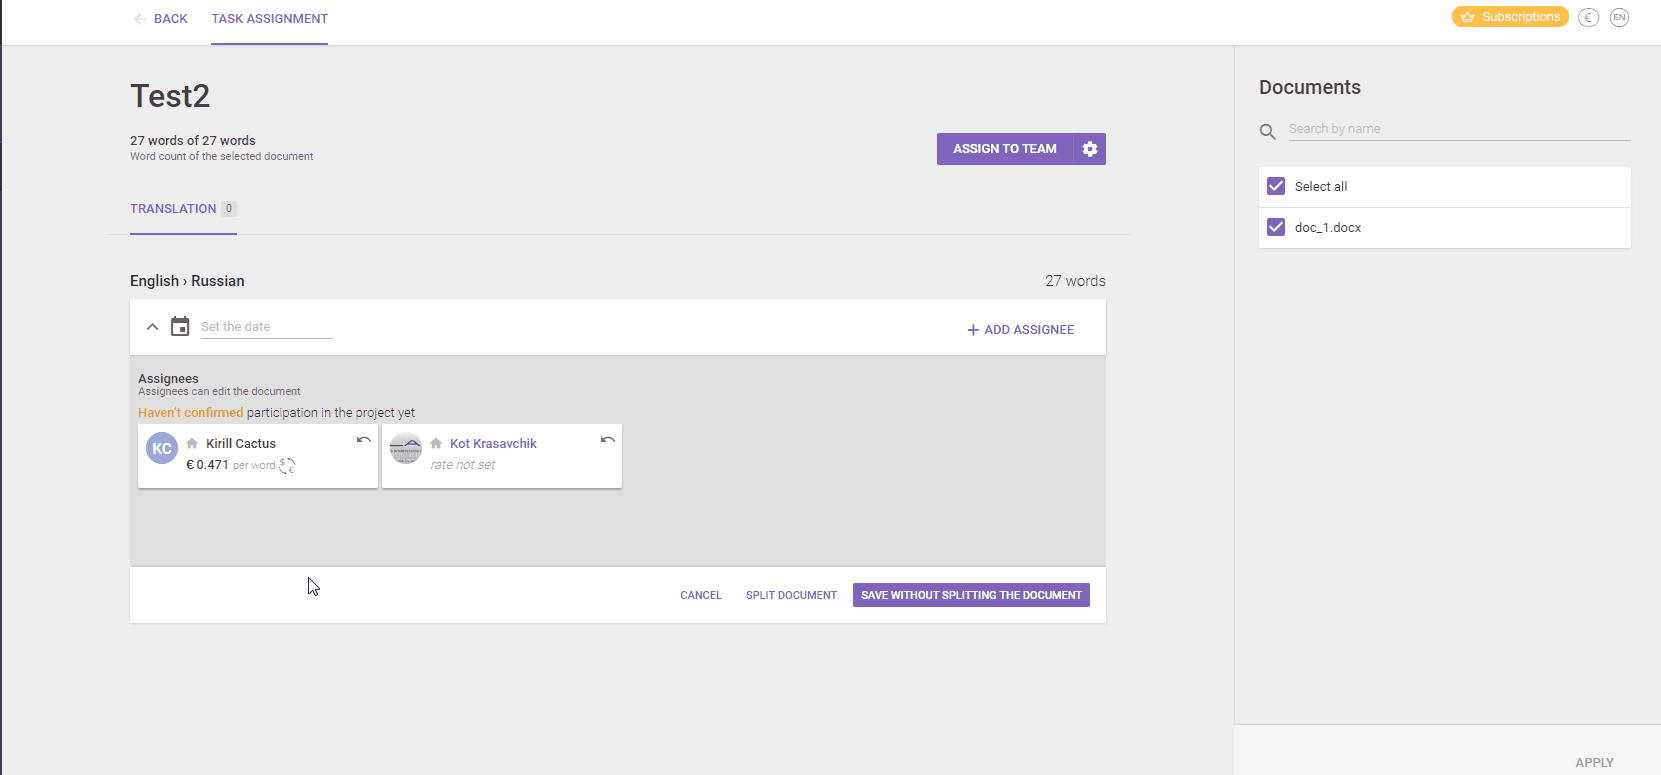
Each of them will only be able to edit segments in that range. The assignees will be able to see — but not edit — each other’s segments.
Alternatively, you can click Save without splitting the document, so any assignee will be able to edit any segment — even if it’s already confirmed.
Important! When calculating the price, Smartcat accrues the cost of segments for the first person who confirms it. In the non-split mode, an assignee can edit segments already confirmed by others, which may lead to confusion. That is why we do not recommend this approach unless you are 100% sure that all assignees understand said price calculation specifics.
Step 4. Track the progress
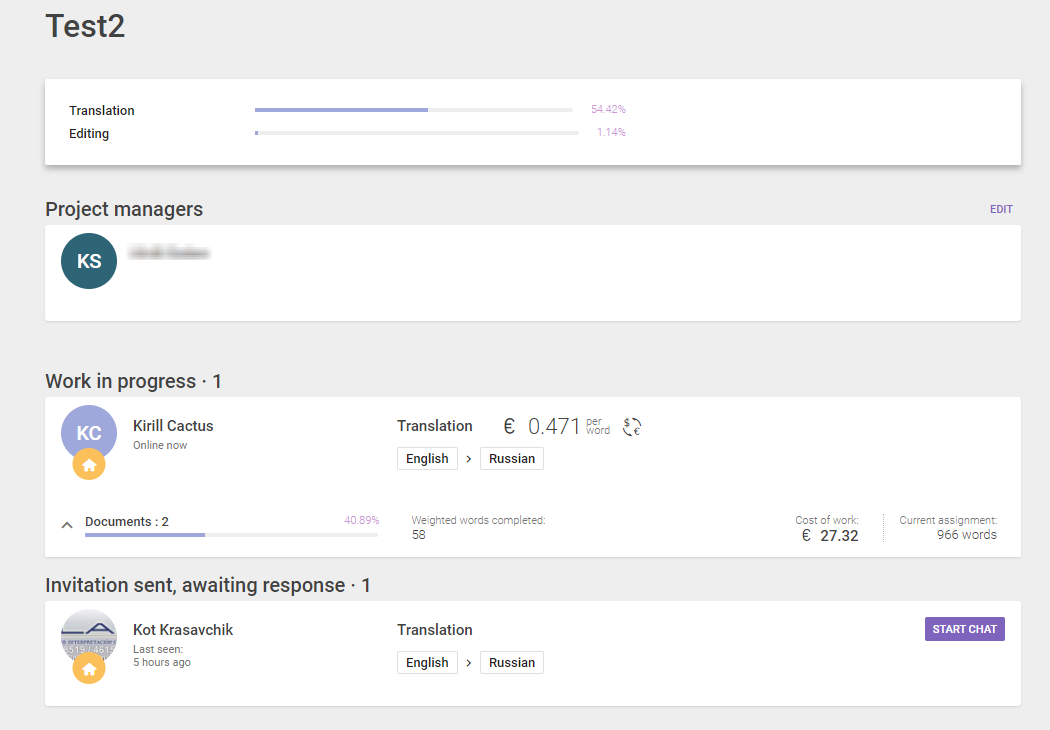
As the work progresses, you can track the progress of each document on the project page:

You can also see the progress of each assignee under the Team tab. If you have specified the participants’ rates in their profiles, you will also be able to see a transparent calculation of the cost of their work. This is the same calculation they will see themselves — so you won’t need to bring prices into line.
Step 5. Communicating with participants
If you or assignees have any questions, you can communicate with each other via the chat. To do this, just click Send a message on their profile page. You can also access the chat via the main menu:
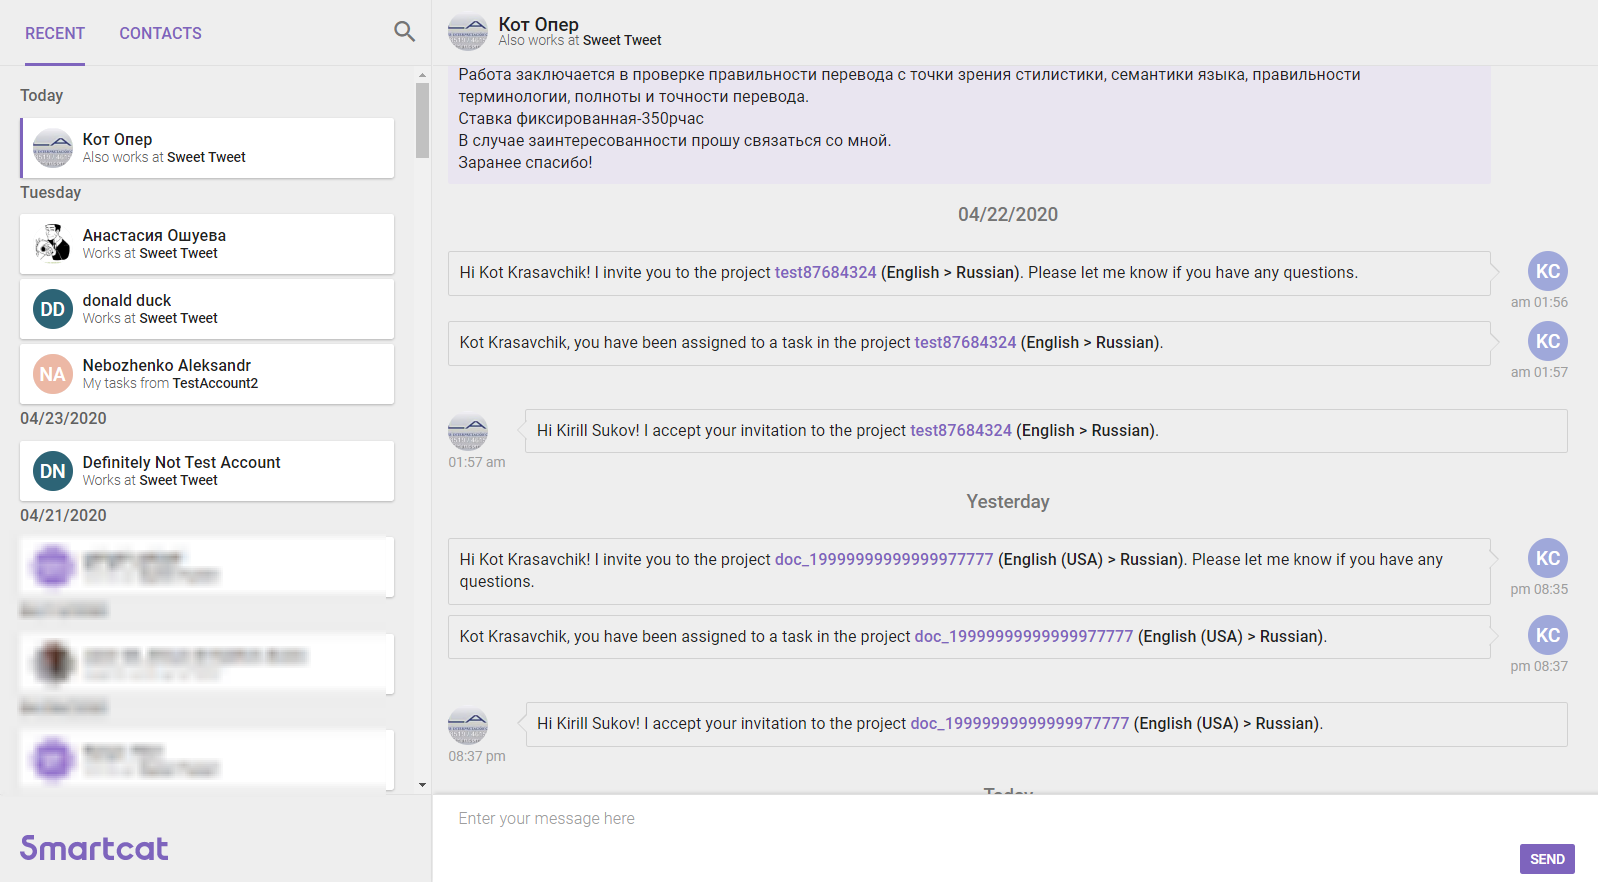
You will get email notifications about all new chat messages.
Another option for the assignees is to leave their questions in comments to specific documents and segments. You will get email notifications about such comments, with a link to the corresponding segment.
Step 6. Accept work and pay
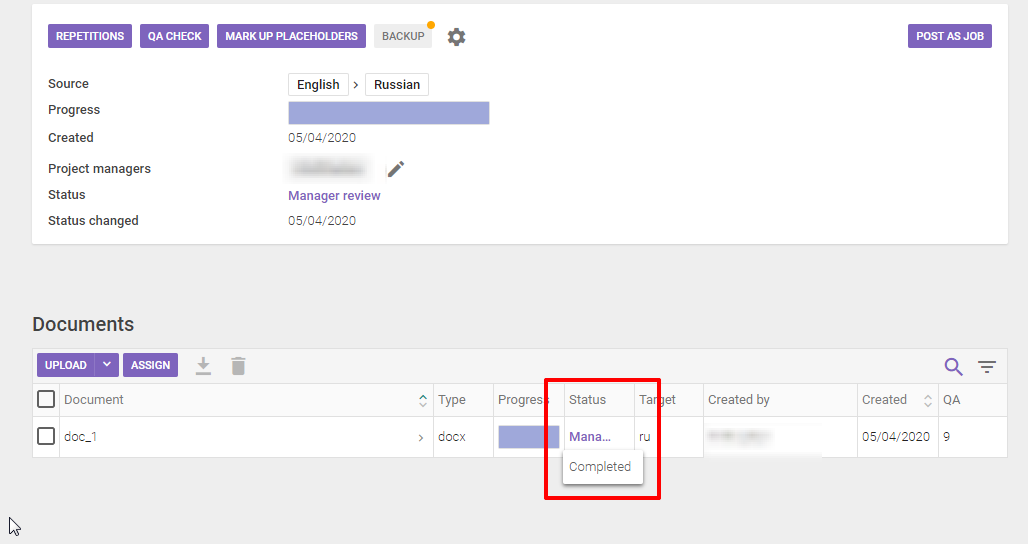
When the project is finished, it is important to review the result and accept it by moving the document to the "Completed" status. Thus, you confirm that you accept the quality of all assignees who have worked on the document:
Once you do this, the jobs of all freelancers you found on the Smartcat Marketplace will appear in the Payments section. You can open it via the main menu:
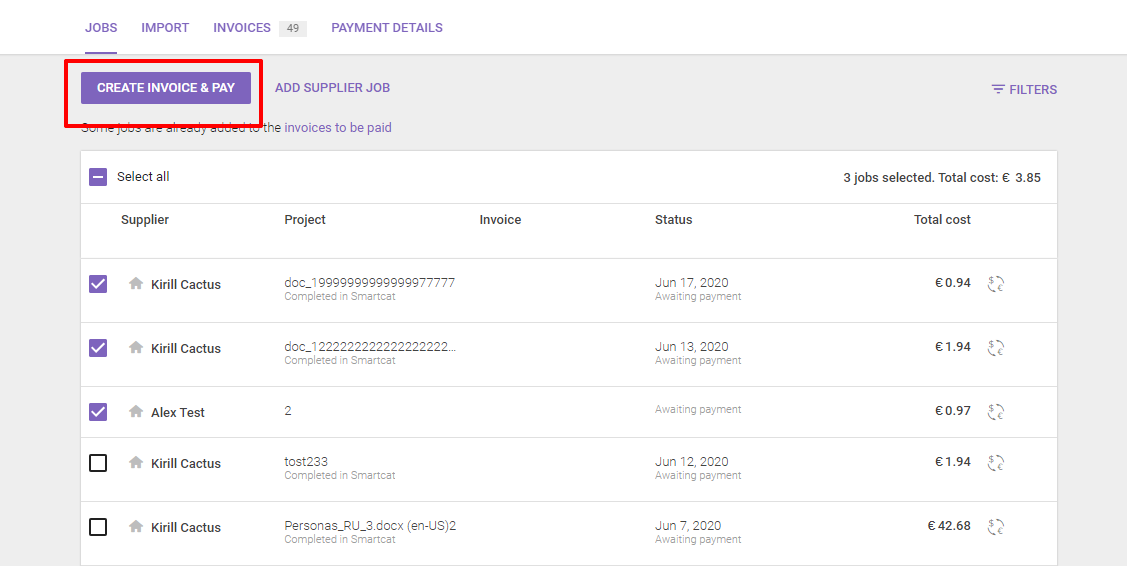
When the time to pay comes, you can mark all the payable jobs and create a single invoice for all of them.

You will be able to pay it via a bank card, PayPal, or a wire transfer.
FAQ
How long do I have to wait for a response from the invitees?
It depends on many factors, but the majority of responses will come in the first 30–60 minutes.
How often do I have to pay freelancers?
You can set your own terms of payment in your company profile. Make sure to do this before you send out project invitations, so linguists will know what to expect.
Can I pay my own freelancers via Smartcat?
Sure. If you set their rates after inviting them to your team by email, Smartcat will be calculating the price of their work automatically.
Do I have to pay Smartcat separately for finding linguists on the platform?
Rates of linguists you have found on the Smartcat Marketplace already include the Smartcat service fee.
Did this article help you find the answer you were looking for? If not or if you have further questions, please contact our support team.
